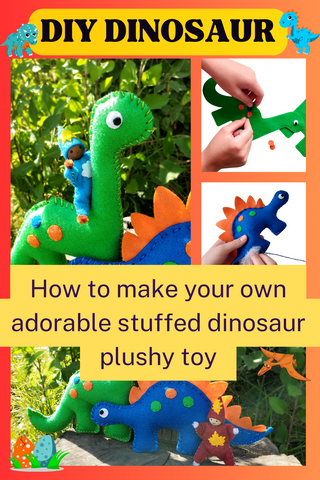
Dinosaur Craft Kit Instructions
Posted by Suzanne Barker on
Ready to sew your very own dinosaur plushy? Our Dinosaur craft it is perfect for beginners! Kids of all ages will have a blast making their own felt softy dinosaur.
Step 1. Thread your small sewing needle with regular thread and knot the end. Using a running stitch, sew an eye to each outward side of your dinosaurs. Next, place any desired spots where you would like them and sew them on.

Step 2. For the green dino- thread your large tapestry needle with embroidery thread and knot the end. Place the two sides of your dino together (eyes facing out). Thread the needle through one of the holes at the upper back, making sure your knot is on the inside. Continue sewing around the dinosaur using an overcast stitch until you reach the lower back. Use the pre-measured stuffing to stuff and finish sewing up the back. Use a backstitch to tie off the end of your thread.
Step 3. For the blue dinosaur- thread your large tapestry needle with embroidery thread and knot the end. Place the two sides of your dino together (eyes facing out) with the orange spikes in the middle.
Line up the last hole in the spikes with the 2nd to last hole on the tail. Thread the needle through the last hole on the tail, making sure your knot is on the inside. Using a running stitch, sew the 3 pieces together.
When you come to the end of the spikes, continue sewing the 2 sides of the dinosaur using an overcast stitch leaving an opening at the tail. Use the pre-measured stuffing to stuff and finish sewing up the rest of the way and use a backstitch to tie off the end of your thread.
Congratulations! You did it!
Enjoy your new dinosaurs!
Share this post
- 0 comment
- Tags: Craft Kits, Dinosaur, Instructions, Sewing Kit


